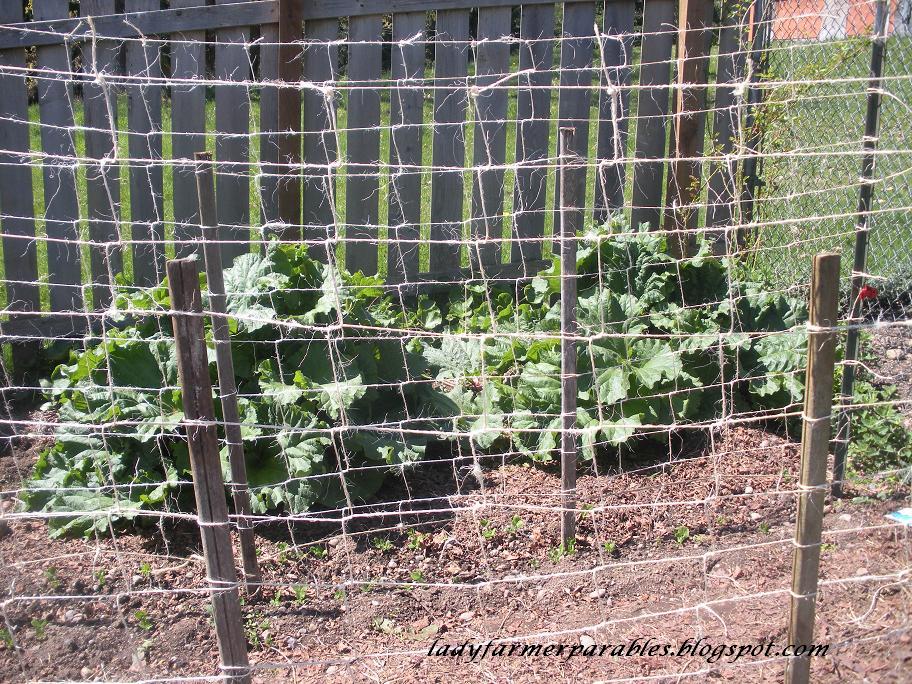
Making your own pea trellis
from baling twine is fun, cheap inexpensive,
and I like not having to purchase
plastic every year that is costly and
unpleasant,not to mention time consuming, to try
to remove the dead vines from.
It can be found at your farm store or garden supply store.
Here is what I did!
I used metal T posts for the ends of my pea rows,
pounded in before the peas were planted.
I planted my peas in a double row
to grow up either side of the trellis.
Starting at the bottom of one of the posts,
string lengths of twine between the posts and
tie off on opposite post.
Continue up the post, adding new rows
about every 4 inches apart.
I like to have some tall stakes pounded in
between the posts to support
and help prevent trellis from sagging.
When all horizontal rows are completed,
tie the free end of twine to the top row
about 4 inches in
from the post. Measure to the ground and add
about six extra inches.
Bring twine down to the next row,
down over the front of the cross piece...

under and up the back...

then over the top and down to the next row.

Continue down the rows of cross pieces
and tie to the bottom row.
Snip off any extra with scissors if desired.

Repeat every 4 inches across, starting at the top.
This makes a nice looking trellis for your peas
that can be composted along with your pea vines
at the end of the season.
Joining:
Amy at Homestead Revival's
Barn Hop
Heidi at My Simple Country Living
for
Country Garden Showcase
Jami's Tuesday Garden Party
at An Oregon Cottage
Deborah Jean's
Farmgirl Friday #55
Heidi at My Simple Country Living
for
Country Garden Showcase
Jami's Tuesday Garden Party
at An Oregon Cottage
Deborah Jean's
Farmgirl Friday #55